Sometimes you just need the perfect baby shower gift idea. Something that is one-of-a-kind and handmade with love. Learning how to make baby shoes may sound intimidating, but even if you have only just started to explore the world of sewing, this tutorial will help make it easy – and lots of fun!
With some fabric scraps, quality interfacing, cute printed fabric and even some notions and trim like ribbon or canvas tape – you can create beautiful, precious little shoes or booties fit for a tiny pair of feet.
So grab your machine, fire up those creative juices and let’s get sewing!

Before we run off gathering supplies and getting our sewing machine out, let’s talk about a few things that are critical to making a set of shoes for baby.
Printable PDF Version of how to make a Baby Shoes - This PDF version has been optimized for printing and you won’t need to access the internet every time you want to make it. If you would like to purchase an ad free printable version of this sewing pattern & tutorial, please visit our Etsy Shop listing for our Baby Shoes Printable Pattern & you can purchase a PDF downloadable version of this easy sewing pattern & tutorial or you can keep reading for the free version of this tutorial.
First and foremost, we need to talk about the fabric. When it comes to sewing baby shoes, selecting the right fabrics is crucial in ensuring the comfort and safety of your precious little one’s feet.
Soft and breathable fabrics like cotton, flannel, and fleece are recommended as they allow air to circulate, preventing your baby’s feet from getting too sweaty or overheated.
Avoid using synthetic materials as they can be uncomfortable and can cause irritation to the delicate skin of your baby’s feet.
It’s also important to consider the durability of the fabric as baby shoes are likely to be washed frequently.
And finally, let’s talk about print. Because these shoes are just SO tiny, keep in mind that you need a small print or plan for the print to be cut-off. There’s not a lot of surface area on these shoes, or a baby’s feet, so the size of the print needs to be a consideration.
By carefully choosing the fabric for your baby shoe project, you can create a pair of shoes that not only looks stylish but also ensures the comfort and safety of your baby’s feet.

Deciding which size of the baby shoe sewing pattern for your DIY baby shoes is so important to do before you start sewing as the last thing you want to do is make a pair of these baby slippers to small!
Babies grow quickly, and it’s important to make sure the booties or socks won’t slip off their little feet – or you can’t squeeze them in there once you’ve spent all that time sewing them up. Just because a baby is 6 months old does not guarantee that the 3-6 month size is going to fit them – each baby is different and each foot is unique.
So, start by measuring the length of the baby’s foot. Find the size sole of the pattern that appears to fit best, with the consideration that there is a ¼-inch seam allowance.
Do not just measure the baby’s foot length, though. If the baby’s foot is particularly chunky (some babies have a really chunky foot, let’s be honest), size up. The fabric may have a little stretch to it, but no amount of give is going to be enough if the baby’s foot is too chubby to get through the opening. When in doubt size up as you can always just use the baby shoes once they grow a little more trust it is fast!
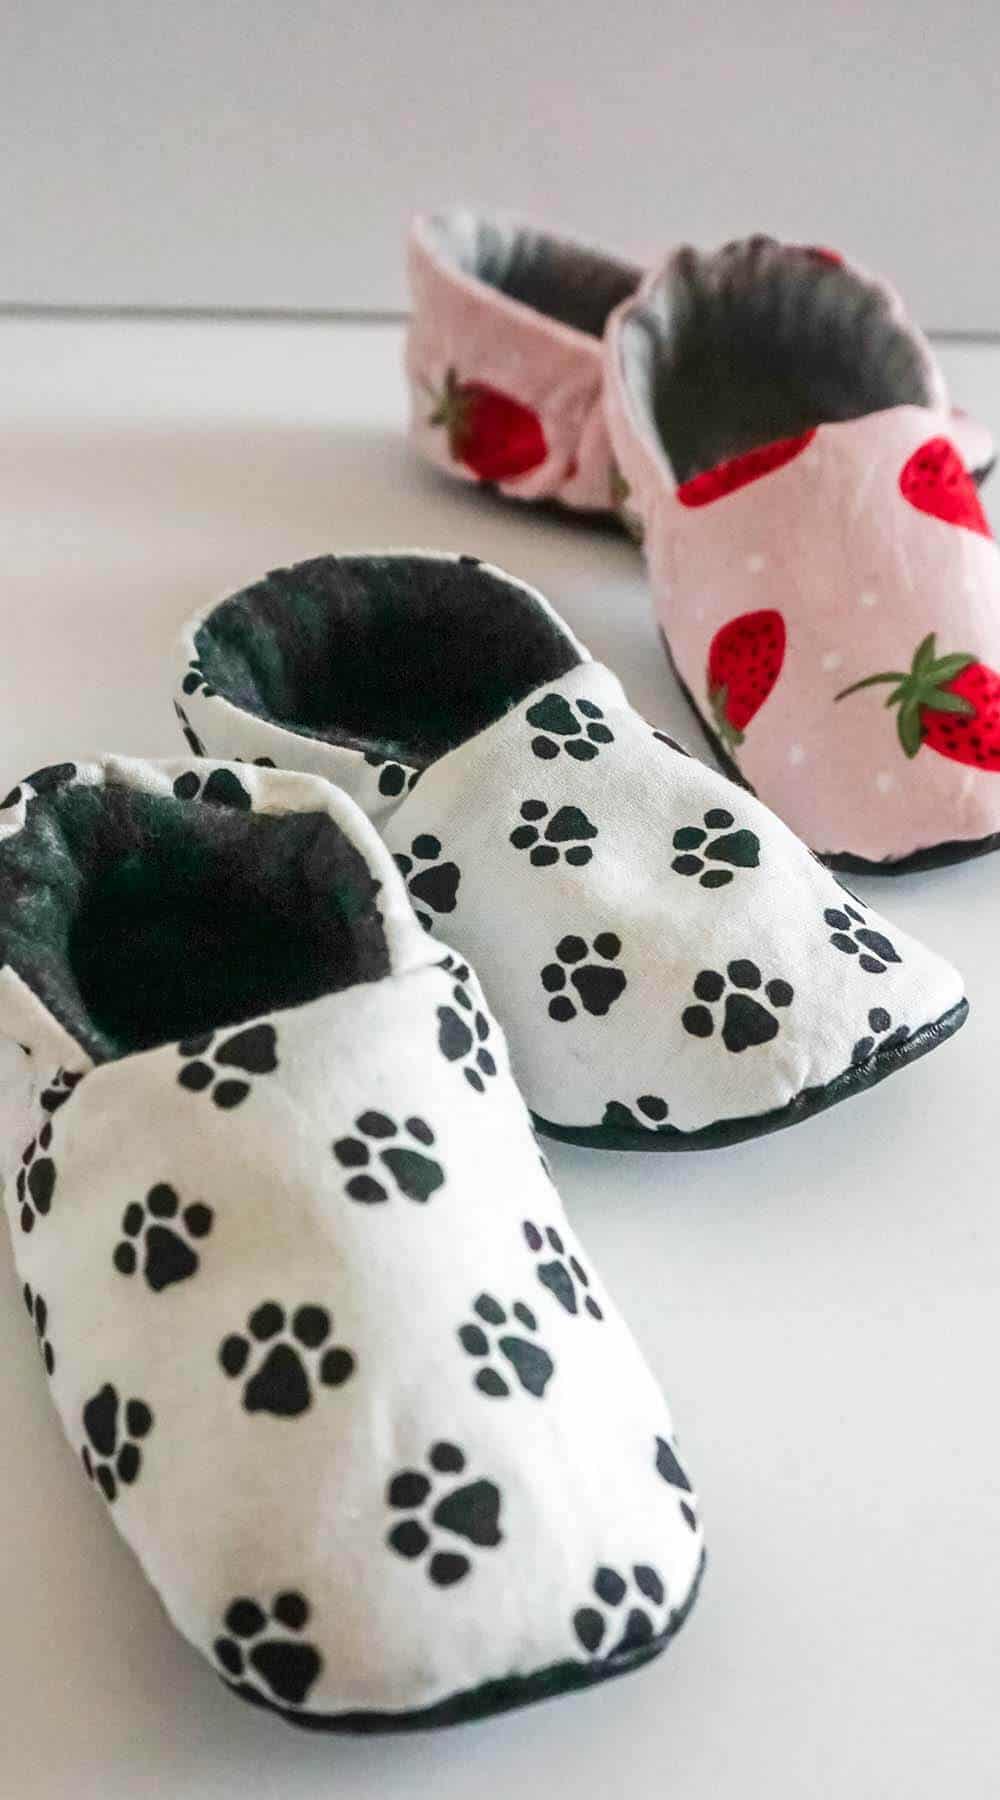
I get it, baby shoes are more than just a practical necessity. They are the perfect opportunity to show off your personal style and add some flair to your outfit. Even when you’re in the 1-and-under crowd.
Adding bows, laces, or other finishing touches is an easy way to embellish these infant shoes and make them stand out. Whether you prefer bold and colorful accents or subtle and delicate details, there are endless possibilities to customize your shoes to fit your unique taste.
So why settle for plain and boring shoes when you can elevate them with some creative and stylish touches? Give your shoes the attention they deserve with some thoughtful embellishments.
However, keep in mind that you need to secure those things VERY well to the baby shoes. Everything you put on or near a baby you have to consider that it WILL end up in their mouth. So, do not simply secure with a stitch or two. Make sure that anything you add to your homemade baby shoes is secured VERY well.
Now, with all that out of the way, let’s get sewing our free infant shoe pattern!

What you need for this free baby shoe pattern is about ¼ yard cotton for the outside shoe fabric, about ¼ yard thin fleece for the inside lining fabric, ¼ yard faux leather (I used scraps) for the soles, ¼ yard fusible lightweight interfacing, and ½-inch wide braided elastic – the length will be based on the shoe size, but you will need no more than 12-inches. Remember some people call them baby shoes others call them baby slippers you can call them whichever you want.
You’ll also want:
Ok. Now that you have all those materials in hand, let’s actually make these baby shoes.

Whenever I start a new sewing project I prefer to wash, dry and press the fabric first. Especially when the fabric is cotton. This way if I need to wash it after it is finished there is less opportunity for shrinking. Please don’t skip this step as it is an important one for any sewing project.

While that’s washing, you can get started by cutting out your free baby slipper pattern from the paper or purchase our 0 -24 months Baby Shoes Printable Pattern that includes all sizes in that range. I mentioned above that you need to consider chonky feet in addition to length. Keep that in mind. Also, take care to cut out the matching size pieces so that they’re the correct sizing.

When your fabric is ready, cut out the following elements:
Cut two pieces of elastic (one for each shoe) that corresponds with the size shoe you are making:
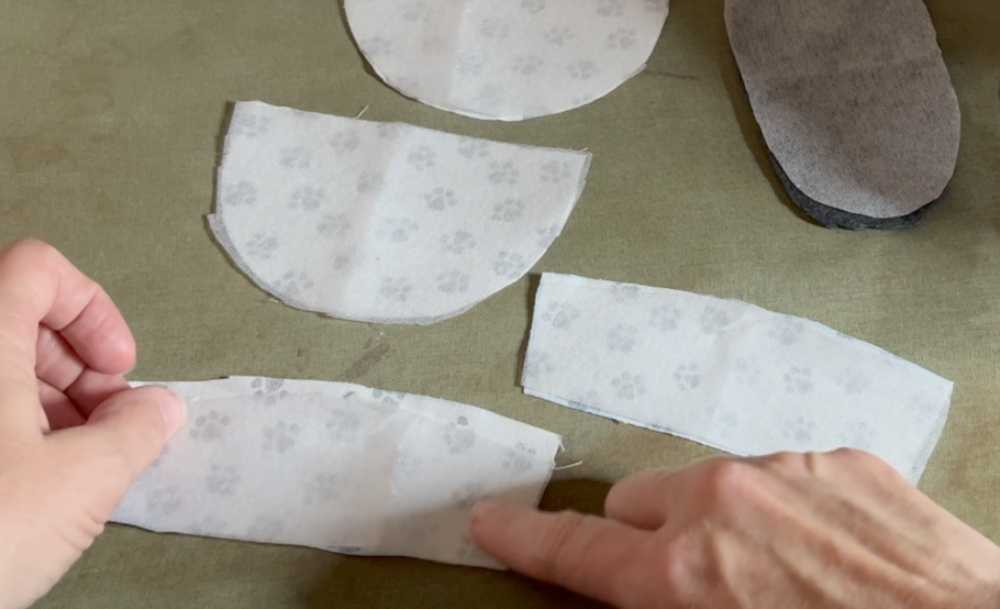
Iron on the fusible interfacing to the wrong side of the outside fabric pieces for the toe and heel as well as the lining piece for the sole.


Pin the right sides together of the outside heel piece and lining heel piece, and sew the curved edge with a ¼-inch seam.

Iron the seam open and trim any excess off each side of the seam, leaving it about ⅛-inch.
Fold the heel in half with wrong sides facing and press the seam neatly.
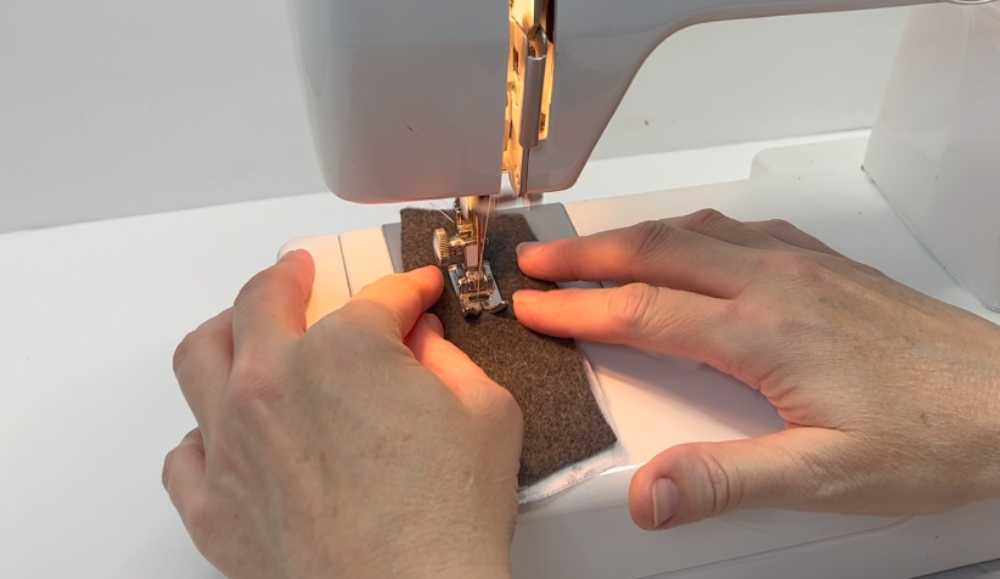
Run a ½-inch seam from the folded edge to make the casing for the elastic. Take care to backstitch at the beginning and end of the seam.

Attach a safety pin to one end of an elastic piece and, using the safety pin, thread the elastic into one open end of the casing channel. Work the elastic all the way through the casing and secure both ends of the elastic with a pin to hold in place.
Repeat to make the second heel.

Place a completed heel piece on top of the outside toe piece with the finished elastic edge facing toward the middle of the toe piece and one short edge of the heel piece lined-up with the flat edge of the toe piece, in the corner. The toe lining piece should be placed with right sides together on top of the heel piece.
The following is what your baby shoe pieces should be stacked like:

Starting from the outside corner, stitch over your sandwich with a ¼-inch seam along the flat side of the toe piece, going only so far as the edge of the heel piece. Take care to catch both of the toe piece layers AND the heel piece layer in your seam.
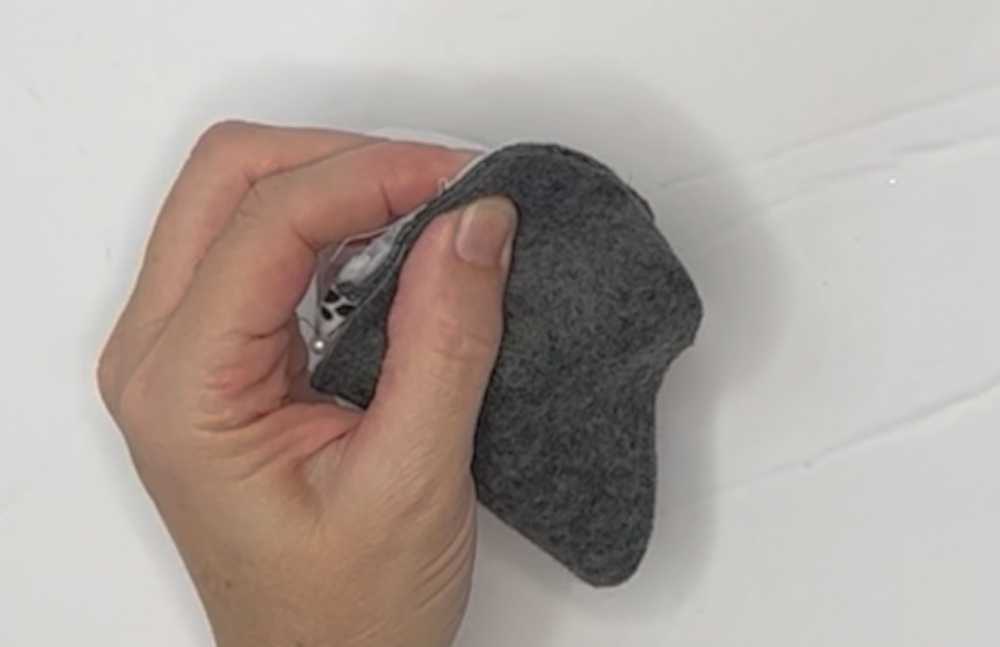
Curve the heel piece around to fit the other end of it into the other corner of the toe piece, between the lining and outside piece of the toe.

Stitch in place across the remaining un-sewn flat edge of the toe. These stitches should meet up with the stitches you made to secure the first side of the heel piece. Take care to catch both of the toe piece layers AND the heel piece layer in your seam.
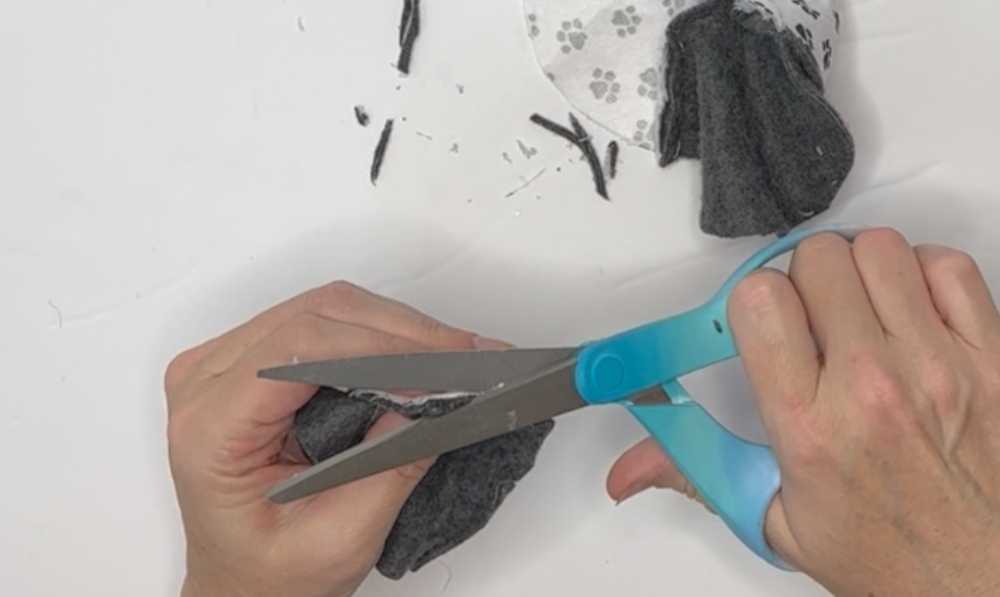
Iron the seam open and trim any excess off each side of the seam, leaving it about ⅛-inch.
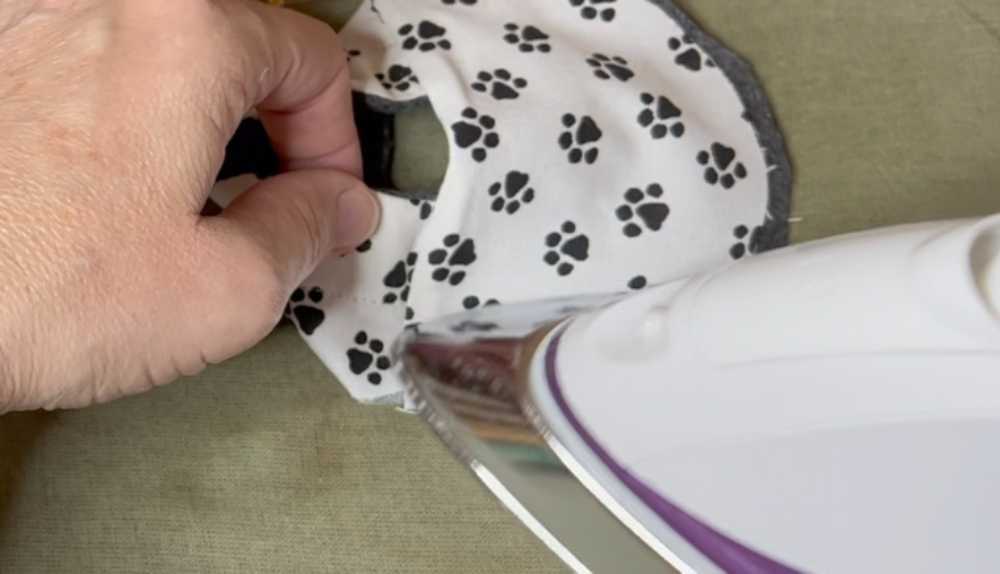
Fold the toe piece in half with wrong sides facing and press the seam neatly.
Repeat to make the second toe-and-heel element.
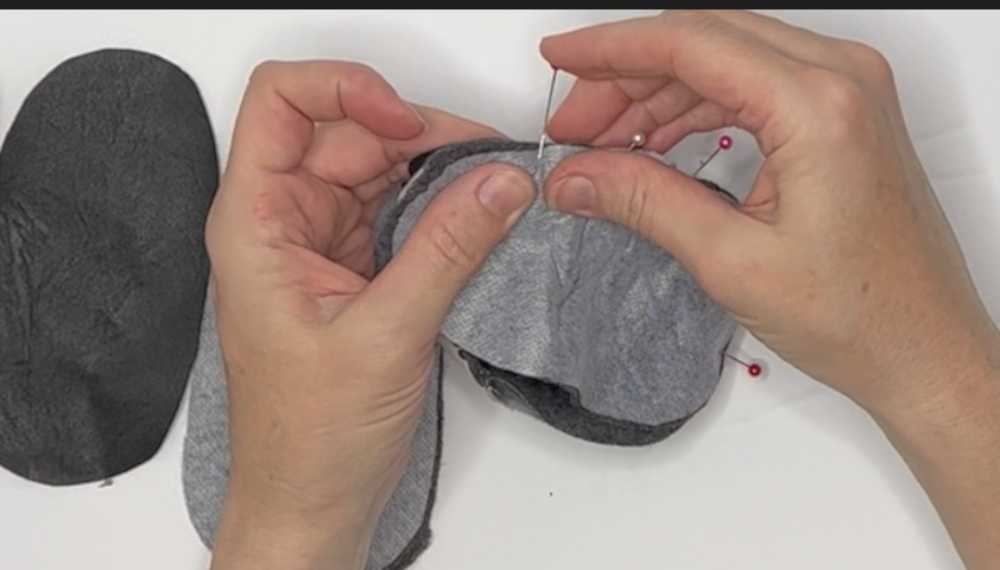
Place the faux leather sole on the bottom of the toe-and-heel element right side down on top of the shoe toe. Then, place the lining sole piece right side up underneath the completed shoe toe-and-heel element. Take care to align the center of each piece at the toe and the heel. Pin in place, leaving a 1-inch opening at the heel.
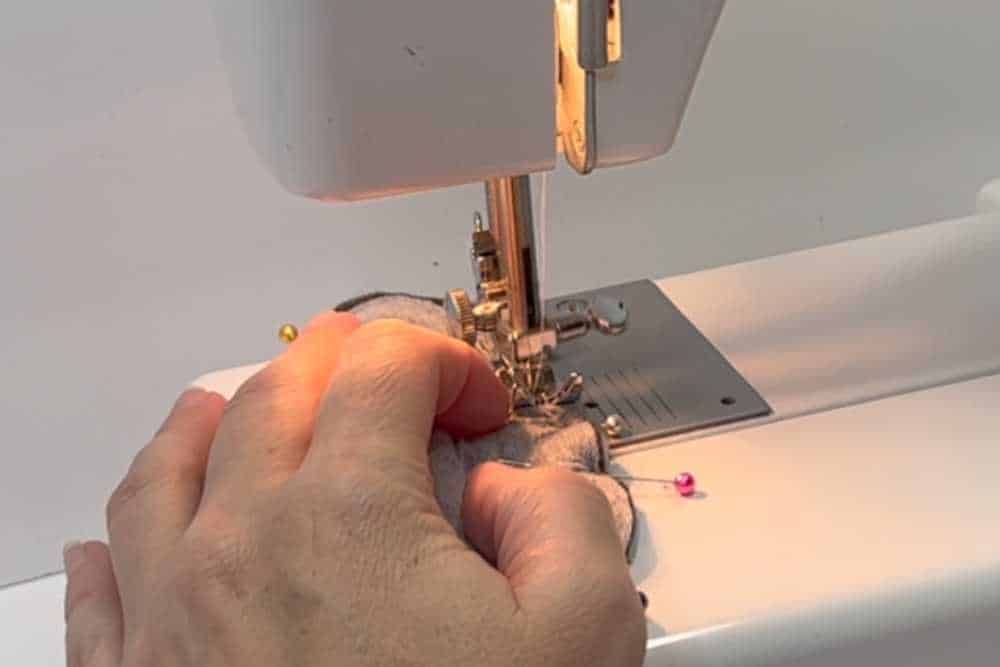
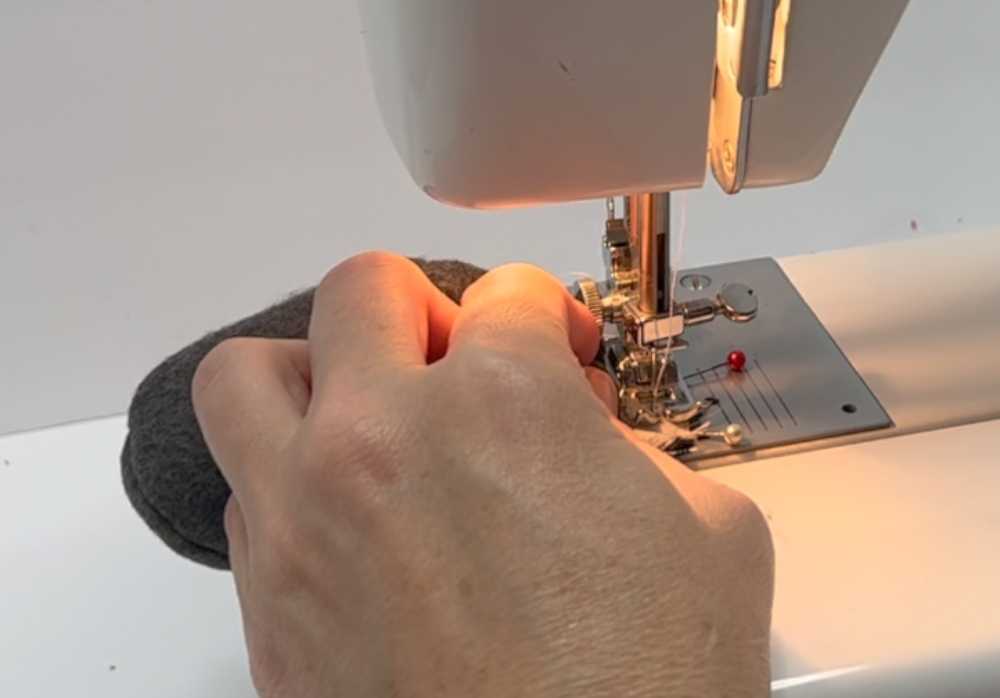
Sew around the sole edge with a ¼-inch seam, then trim the sewn edge to ⅛”.
Turn the shoe right-side-out.
Fold in the open edge of the lining fabric and the open edge of the sole and outside fabric at the unfinished opening and hand stitch the opening closed with the raw edges tucked inside.
Repeat for the second infant shoe. And then you’re done! Now try those baby shoes on their adorable feet.

Sewing your own baby shoes is a fun and satisfying project that anyone can do – even with minimal sewing experience! You have to admit the baby slippers are adorable.
You’ll create something wonderfully unique for this child that will make you squee. And perhaps the best part? Knowing that you made it yourself!
If you liked this how to make baby shoes with printable sewing pattern, make sure to pin it to your favorite Pinterest board or share it with friends on social media. If you decide to make it take a picture afterward and tag us on social media as we love seeing the fabrics and color choices others make.
Yield: 1 Pair Baby Shoes

Print
Simple and fun, this tutorial for how to make baby shoes with printable pattern is perfect for baby slippers in all sorts of sizes.
Prep Time 10 minutes
Active Time 30 minutes
Total Time 40 minutes
Difficulty Easy
Estimated Cost $1.97
As an Amazon Associate and member of other affiliate programs, I earn from qualifying purchases.
Project Type: Sewing / Category: DIY/Sewing

The post How To Make Baby Shoes With Printable Pattern appeared first on Happiest Camper.
With some fabric scraps, quality interfacing, cute printed fabric and even some notions and trim like ribbon or canvas tape – you can create beautiful, precious little shoes or booties fit for a tiny pair of feet.
So grab your machine, fire up those creative juices and let’s get sewing!

How To Make Baby Shoes With Printable Pattern
Before we run off gathering supplies and getting our sewing machine out, let’s talk about a few things that are critical to making a set of shoes for baby.
Printable PDF Version of how to make a Baby Shoes - This PDF version has been optimized for printing and you won’t need to access the internet every time you want to make it. If you would like to purchase an ad free printable version of this sewing pattern & tutorial, please visit our Etsy Shop listing for our Baby Shoes Printable Pattern & you can purchase a PDF downloadable version of this easy sewing pattern & tutorial or you can keep reading for the free version of this tutorial.
Choosing Fabric for DIY Baby Slippers
First and foremost, we need to talk about the fabric. When it comes to sewing baby shoes, selecting the right fabrics is crucial in ensuring the comfort and safety of your precious little one’s feet.
Soft and breathable fabrics like cotton, flannel, and fleece are recommended as they allow air to circulate, preventing your baby’s feet from getting too sweaty or overheated.
Avoid using synthetic materials as they can be uncomfortable and can cause irritation to the delicate skin of your baby’s feet.
It’s also important to consider the durability of the fabric as baby shoes are likely to be washed frequently.
And finally, let’s talk about print. Because these shoes are just SO tiny, keep in mind that you need a small print or plan for the print to be cut-off. There’s not a lot of surface area on these shoes, or a baby’s feet, so the size of the print needs to be a consideration.
By carefully choosing the fabric for your baby shoe project, you can create a pair of shoes that not only looks stylish but also ensures the comfort and safety of your baby’s feet.

Tips for Sizing a Baby Shoe
Deciding which size of the baby shoe sewing pattern for your DIY baby shoes is so important to do before you start sewing as the last thing you want to do is make a pair of these baby slippers to small!
Babies grow quickly, and it’s important to make sure the booties or socks won’t slip off their little feet – or you can’t squeeze them in there once you’ve spent all that time sewing them up. Just because a baby is 6 months old does not guarantee that the 3-6 month size is going to fit them – each baby is different and each foot is unique.
So, start by measuring the length of the baby’s foot. Find the size sole of the pattern that appears to fit best, with the consideration that there is a ¼-inch seam allowance.
Do not just measure the baby’s foot length, though. If the baby’s foot is particularly chunky (some babies have a really chunky foot, let’s be honest), size up. The fabric may have a little stretch to it, but no amount of give is going to be enough if the baby’s foot is too chubby to get through the opening. When in doubt size up as you can always just use the baby shoes once they grow a little more trust it is fast!

Embellishing Infant Shoes with Bows, Laces or other Finishing Touches
I get it, baby shoes are more than just a practical necessity. They are the perfect opportunity to show off your personal style and add some flair to your outfit. Even when you’re in the 1-and-under crowd.
Adding bows, laces, or other finishing touches is an easy way to embellish these infant shoes and make them stand out. Whether you prefer bold and colorful accents or subtle and delicate details, there are endless possibilities to customize your shoes to fit your unique taste.
So why settle for plain and boring shoes when you can elevate them with some creative and stylish touches? Give your shoes the attention they deserve with some thoughtful embellishments.
However, keep in mind that you need to secure those things VERY well to the baby shoes. Everything you put on or near a baby you have to consider that it WILL end up in their mouth. So, do not simply secure with a stitch or two. Make sure that anything you add to your homemade baby shoes is secured VERY well.
Now, with all that out of the way, let’s get sewing our free infant shoe pattern!

What You Need For This Free Baby Shoe Pattern
What you need for this free baby shoe pattern is about ¼ yard cotton for the outside shoe fabric, about ¼ yard thin fleece for the inside lining fabric, ¼ yard faux leather (I used scraps) for the soles, ¼ yard fusible lightweight interfacing, and ½-inch wide braided elastic – the length will be based on the shoe size, but you will need no more than 12-inches. Remember some people call them baby shoes others call them baby slippers you can call them whichever you want.
You’ll also want:
- Free Printable Pattern (24-month size only) or you can Purchase our 0 -24 months Baby Shoes Printable Pattern that includes all sizes in that range.
- Matching thread
- Needle(s) for hand sewing
- Turning tool or chopstick
- Iron
- Pins
- Scissors
- Optional Rotary Cutter & Mat
- Measuring tape
- Thread nippers
- Sewing machine
Ok. Now that you have all those materials in hand, let’s actually make these baby shoes.

How to Sew This Baby Shoe Pattern
Whenever I start a new sewing project I prefer to wash, dry and press the fabric first. Especially when the fabric is cotton. This way if I need to wash it after it is finished there is less opportunity for shrinking. Please don’t skip this step as it is an important one for any sewing project.

While that’s washing, you can get started by cutting out your free baby slipper pattern from the paper or purchase our 0 -24 months Baby Shoes Printable Pattern that includes all sizes in that range. I mentioned above that you need to consider chonky feet in addition to length. Keep that in mind. Also, take care to cut out the matching size pieces so that they’re the correct sizing.

When your fabric is ready, cut out the following elements:
- Baby Shoe Toe
- 2 outside fabric
- 2 inside lining fabric
- 2 interfacing
- Baby Shoe Sole
- 2 faux leather sole fabric
- 2 inside lining fabric
- 2 interfacing
- Baby Shoe Heel
- 2 outside fabric
- 2 inside lining fabric
- 2 interfacing
Cut two pieces of elastic (one for each shoe) that corresponds with the size shoe you are making:
- 0-3 month – 3 ¾” long
- 3-6 month – 4” long
- 6-9 month – 4 ¼” long
- 9-12 month – 4 ½” long
- 12-18 month – 4 ¾” long
- 18-21 month – 5” long
- 21-24 month – 5 ¼” long

Iron on the fusible interfacing to the wrong side of the outside fabric pieces for the toe and heel as well as the lining piece for the sole.


Pin the right sides together of the outside heel piece and lining heel piece, and sew the curved edge with a ¼-inch seam.

Iron the seam open and trim any excess off each side of the seam, leaving it about ⅛-inch.
Fold the heel in half with wrong sides facing and press the seam neatly.

Run a ½-inch seam from the folded edge to make the casing for the elastic. Take care to backstitch at the beginning and end of the seam.

Attach a safety pin to one end of an elastic piece and, using the safety pin, thread the elastic into one open end of the casing channel. Work the elastic all the way through the casing and secure both ends of the elastic with a pin to hold in place.
Repeat to make the second heel.

Place a completed heel piece on top of the outside toe piece with the finished elastic edge facing toward the middle of the toe piece and one short edge of the heel piece lined-up with the flat edge of the toe piece, in the corner. The toe lining piece should be placed with right sides together on top of the heel piece.
The following is what your baby shoe pieces should be stacked like:
- Bottom – Outside toe piece, right side up
- Middle – Finished heel piece, wrong side up
- Top – Lining toe piece, wrong side down

Starting from the outside corner, stitch over your sandwich with a ¼-inch seam along the flat side of the toe piece, going only so far as the edge of the heel piece. Take care to catch both of the toe piece layers AND the heel piece layer in your seam.

Curve the heel piece around to fit the other end of it into the other corner of the toe piece, between the lining and outside piece of the toe.

Stitch in place across the remaining un-sewn flat edge of the toe. These stitches should meet up with the stitches you made to secure the first side of the heel piece. Take care to catch both of the toe piece layers AND the heel piece layer in your seam.

Iron the seam open and trim any excess off each side of the seam, leaving it about ⅛-inch.

Fold the toe piece in half with wrong sides facing and press the seam neatly.
Repeat to make the second toe-and-heel element.

Place the faux leather sole on the bottom of the toe-and-heel element right side down on top of the shoe toe. Then, place the lining sole piece right side up underneath the completed shoe toe-and-heel element. Take care to align the center of each piece at the toe and the heel. Pin in place, leaving a 1-inch opening at the heel.

Sew around the sole edge with a ¼-inch seam, then trim the sewn edge to ⅛”.

Turn the shoe right-side-out.
Fold in the open edge of the lining fabric and the open edge of the sole and outside fabric at the unfinished opening and hand stitch the opening closed with the raw edges tucked inside.
Repeat for the second infant shoe. And then you’re done! Now try those baby shoes on their adorable feet.

Sewing your own baby shoes is a fun and satisfying project that anyone can do – even with minimal sewing experience! You have to admit the baby slippers are adorable.
You’ll create something wonderfully unique for this child that will make you squee. And perhaps the best part? Knowing that you made it yourself!
If you liked this how to make baby shoes with printable sewing pattern, make sure to pin it to your favorite Pinterest board or share it with friends on social media. If you decide to make it take a picture afterward and tag us on social media as we love seeing the fabrics and color choices others make.
Yield: 1 Pair Baby Shoes
Free Baby Shoe Pattern

Simple and fun, this tutorial for how to make baby shoes with printable pattern is perfect for baby slippers in all sorts of sizes.
Prep Time 10 minutes
Active Time 30 minutes
Total Time 40 minutes
Difficulty Easy
Estimated Cost $1.97
Materials
- Outside Fabric: ¼ yard cotton
- Inside Lining Fabric: ¼ yard thin fleece
- Sole Fabric: ¼ yard faux leather (I used scraps)
- ¼ yard fusible lightweight interfacing
- ½-inch wide braided elastic – the length will be based on the shoe size, but you will need no more than 12-inches
- Matching Thread
Tools
- Printable Pattern
- Needles
- Pins
- Iron & Ironing Board
- Scissors
- Sewing machine
- Safety Pin
Instructions
- Wash, dry and press the fabric.
- Cut out your pattern from the paper.
- When your fabric is washed and pressed, cut out the following elements: For the Baby Shoe Toe: 2 outside fabric, 2 inside lining fabric, 2 interfacing; For the Baby Shoe Sole: 2 faux leather sole fabric, 2 inside lining fabric, 2 interfacing; For the Baby Shoe Heel: 2 outside fabric, 2 inside lining fabric, 2 interfacing
- Cut two pieces of elastic 5 ¼” long.
- Iron on the fusible interfacing to the wrong side of the outside fabric pieces for the toe and heel as well as the lining piece for the sole.
- Pin the right sides together of the outside heel piece and lining heel piece, and sew the curved edge with a ¼-inch seam.
- Iron the seam open and trim any excess off each side of the seam, leaving it about ⅛-inch.
- Fold the heel in half with wrong sides facing and press the seam neatly.
- Run a ½-inch seam from the folded edge to make the casing for the elastic. Take care to backstitch at the beginning and end of the seam.
- Attach a safety pin to one end of an elastic piece and, using the safety pin, thread the elastic into one open end of the casing channel. Work the elastic all the way through the casing and secure both ends of the elastic with a pin to hold in place.
- Repeat to make the second heel.
- Place a completed heel piece on top of the outside toe piece with the finished elastic edge facing toward the middle of the toe piece and one short edge of the heel piece lined-up with the flat edge of the toe piece, in the corner. The toe lining piece should be placed with right sides together on top of the heel piece. The following is what your baby shoe pieces should be stacked like: Bottom – Outside toe piece, right side up; Middle – Finished heel piece, wrong side up; Top – Lining toe piece, wrong side down
- Starting from the outside corner, stitch over your sandwich with a ¼-inch seam along the flat side of the toe piece, going only so far as the edge of the heel piece. Take care to catch both of the toe piece layers AND the heel piece layer in your seam.
- Curve the heel piece around to fit the other end of it into the other corner of the toe piece, between the lining and outside piece of the toe. Stitch in place across the remaining un-sewn flat edge of the toe. These stitches should meet up with the stitches you made to secure the first side of the heel piece. Take care to catch both of the toe piece layers AND the heel piece layer in your seam.
- Iron the seam open and trim any excess off each side of the seam, leaving it about ⅛-inch.
- Fold the toe piece in half with wrong sides facing and press the seam neatly.
- Repeat to make the second toe-and-heel element.
- Place the faux leather sole on the bottom of the toe-and-heel element right side down on top of the shoe toe. Then, place the lining sole piece right side up underneath the completed shoe toe-and-heel element. Take care to align the center of each piece at the toe and the heel. Pin in place, leaving a 1-inch opening at the heel.
- Sew around the sole edge with a ¼-inch seam, then trim the sewn edge to ⅛”.
- Turn the shoe right-side-out.
- Fold in the open edge of the lining fabric and the open edge of the sole and outside fabric at the unfinished opening and hand stitch the opening closed with the raw edges tucked inside.
- Repeat for the second shoe.
Recommended Products
As an Amazon Associate and member of other affiliate programs, I earn from qualifying purchases.

SINGER 07051 Pearlized Head Straight Pins, Size 24, 120-Count, White

Fabric tape measure

Lightweight Fusible Interfacing, 15" x 3 Yards, Package
Project Type: Sewing / Category: DIY/Sewing

More Baby Sewing Projects:
- Easy Sew Baby Blocks From Fabric
- How To Make A No-Sew Baby Blanket
- How To Sew a Minky Baby Blanket
- How To Make A Baby Burp Cloth
- No Sew Fleece Tie Blanket
- How to Make Baby Bibs with Free Pattern
The post How To Make Baby Shoes With Printable Pattern appeared first on Happiest Camper.
